
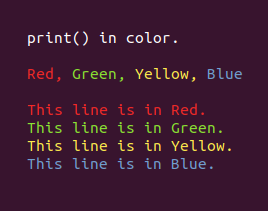
It’s an old trick, but few people today know about this. There are certain codes that you can uses inside the print() function to change the color of the text being written to the screen.
You can also make the text flash, or underline it. There are also codes to move the cursor, and clear part or all of the screen.
This short video shows some examples of what can be done. The Python script that created this video is at the bottom of this document.
The History.
This goes way back; long before Python, or even C+. Back to the days of dumb hardware terminals, connected to a mainframe by coax cable. This was back in the 1970s and early 80s.
By ‘dumb terminals’, I mean that they had no real processing capabilities. They were little more than a text monitor and a keyboard. All the processing was done by the mainframe, which was usually many miles away.
Back in those days, some of the high end terminals had the ability to display colors. So to support the color capabilities, there where certain codes created, called the ANSI escape sequences , that would signal to the terminal that the following text should be displayed in a different color.
These ANSI escape sequences of long ago, are still used by today's Terminal window ( Linux and Mac ) and Command Shell ( Microsoft ).
Also, many telnet applications ( like Putty ) also can make uses of them.
So, we can uses these ANSI escape sequences in our Python scripts, to print text to the Terminal window, in color!
A side note for idle users
If you are using Python’s idle ( Integrated Development and Learning Environment ) as your editor, the idle shell window simply does not support these ANSI escape sequences codes.
So I recommend that you write today’s scripts using idle, but open a Terminal window, and run the script there to see the results.
To open a Terminal window:
On Linux: While holding down the [ctrl] and [alt] keys, tap the letter ‘T’.
On Windows: Press Windows+R to open a “Run box”, enter the letters cmd, and press [Enter].
On Mac: Click the search icon ( the magnifying glass in the upper-right corner of the home screen ), enter the word terminal, and click on the Terminal icon.
Once you have the Terminal window open, enter the command:
python filename.py
where filename.py is the name of the file containing your script.
On some versions of Linux, you might need to uses this command instead:
python3 filename.py
The video above shows an example of me doing this on my Linux computer.
Where to find these ANSI escape sequences codes.
The list of the ANSI escape sequences codes is very long, but we only need a few of them.
If you are interested in seeing the full list, see the Wikipedia page:
https://en.wikipedia.org/wiki/ANSI_escape_code
The ScreenCodes class.
To simplfy using these ANSI escape sequences, I created a class called ScreenCodes. You are welcome to use this in your projects if you wish.
Each of the functions in this class will return a string, that can be printed to the screen using the Python built-in print() function. Each function has a doc string, which describes what they do. Each function is very short, and easy to understand. So...I’m not going to spend a lot of time on documentation here.
The only function in this class that might need a bit of documentation is the setcolor() function. It sets the color of the text to be printed, based on a number ( from 0 to 255 ) passed to it. You will probably need a chart showing the colors and their corresponding numbers. This chart can be found at https://en.wikipedia.org/wiki/ANSI_escape_code#8-bit
You can find the ScreenCodes class in the example code at the bottom of this document.
The ‘end’ parameter in print()
Normally, the print() function will add a carnage return to the end of whatever is being displayed on the screen. This will position the cursor at the start of the next line, ready to print the next thing.
But there are times when we don’t want to do a carnage return, but rather just leave the cursor at the last character sent to the screen. In this case, the next thing sent to the screen will be displayed at the cursors last position, and not on the next line.
So, there is an ‘end’ parameter that we can use to turn off the automatic carnage return.
Example:
print(“This will end with a carnage return.”)
print(“This will be printed on the next line of the screen.”)
print(“This will NOT end with a carnage return.”, end=””)
print(“This will be at the end of the last thing printed.”)
In the example code at the bottom of this document, you will see that some of the print() statements are using the ‘end’ parameter to control where the cursor is on the screen.
Everything else you need to know.
So, the rest is all really simple. The example code at the bottom of this document is self-documenting, and the video at the top of this document shows what it does.
You can cut/past my examples into your projects, where ever you need to print() in color.
So, I don’t need to write a lot of documentation on this subject ( I’m very happy about that ).
"""
printincolor.py
Written by Joe Roten

This scripts show how to use ANSI escape sequences with the
built-in print() function, to print in color.

For documentation, see
  http://gsw7.net/K700012.php
"""

class ScreenCodes:
  """
  ScreenCodes class
  Written by Joe Roten. 2020-09-23.
  """

  import datetime

  def cls(self):
      """Clears the screen and move the cursor to home position."""
      return chr(27) + "[1;1H" + chr(27) + "[J"

  def reset(self):
      """Reset to normal settings."""
      return chr(27) + "[0m"

  def tostart(self):
      """Move the cursor to the begining of the current line."""
      return chr(27) + "[1G"

  def eraseline(self):
      """Erase the current line and move the curser to start."""
      return chr(27) + "[1G" + chr(27) + "[K"

  def cursorup(self):
      """Move the cursor up one line."""
      return chr(27) + "[A"

  def underline(self):
      """Turn underline ON."""
      return chr(27) + "[4m"

  def blink(self):
      """Turn blink ON."""
      return chr(27) + "[5m"

  def red(self, text=""):
      """Print the text in Red."""
      return chr(27) + "[91m" + text + chr(27) + "[0m"

  def green(self, text=""):
      """Print the text in Green."""
      return chr(27) + "[92m" + text + chr(27) + "[0m"

  def yellow(self, text=""):
      """Print the text in Yellow."""
      return chr(27) + "[93m" + text + chr(27) + "[0m"

  def blue(self, text=""):
      """Print the text in Blue."""
      return chr(27) + "[94m" + text + chr(27) + "[0m"

  def alert(self, text=""):
      """Print the text as an Alert."""
      return chr(27) + "[5m" + chr(27) + "[91m" + text + chr(27) + "[0m"

  def warning(self, text=""):
      """Print the text as a Warning."""
      return chr(27) + "[5m" + chr(27) + "[97;101m" + text + chr(27) + "[0m"

  def attention(self, text=""):
      """Print white letters on a blue background."""
      return chr(27) + "[97;44m" + text + chr(27) + "[0m"

  def inverse(self, text=""):
      """Print the text inversed."""
      return chr(27) + "[30;107m" + text + chr(27) + "[0m"

  def invflash(self, text=""):
      """Print the text inversed flashing."""
      return chr(27) + "[5m" + chr(27) + "[30;107m" + text + chr(27) + "[0m"

  def setcolor(self, color=0):
      """Set the foreground color."""
      # See the documentation for a chart of the color codes.
      return chr(27) + "[38;5;" + str( color ) + "m"

  def currenttime(self):
      """Return current datetime as a bright yellow string."""
      reply = chr(27) + "[93m"
      reply = reply + str( self.datetime.datetime.now().strftime("%Y-%m-%d %H:%M:%S"))
      reply = reply + ": " + chr(27) + "[0m"
      return reply

# End of class.


import time

sc = ScreenCodes()

print ( sc.cls(), end='' ) # Clear the screen.

print( __doc__ )

print( "This might be a system console, showing events and the time they occured.")
print ( sc.currenttime() + "The script is now running." )
print ( sc.currenttime() + sc.alert( "Alert " ) + "The printer is DOWN." )
print ( sc.currenttime() + "This line is just general info." )
print ( sc.currenttime() + sc.green( "IMPORTANT " ) + "This is important." )
print ( sc.currenttime() + "The answer to life, the universe, and everything, is 42." )
print ( sc.currenttime() + sc.warning( " WARNING " ) + " This is a warning." )
print ( sc.currenttime() + sc.attention("ATTENTION") + " Something else has happened." )
print("")

print( sc.red("Red, ") + sc.green("Green, ") + sc.yellow("Yellow, ") + sc.blue("Blue") )
print("")

print( sc.red("This line is in Red.") )
print( sc.green("This line is in Green.") )
print( sc.yellow("This line is in Yellow.") )
print( sc.blue("This line is in Blue.") )
print("")

print( sc.inverse("  This text is inverse.  ") )
print("")

print( sc.invflash("***") + sc.inverse(" This text is inverse. ") + sc.invflash("***") )
print( "" )


###############################################
#
# Show the rainbow.
#
###############################################

text = "All the colors of the rainbow. " * 2

print("")
for z in range(0, 300):
  q =  231 - (z % 231)
  print ( sc.cursorup() + sc.eraseline(), end='' )
  for x in range(0,len(text)):
    c = text[x]
    q = q + 1
    if q > 231: q = 16
    if q  < 16: q = 16
    print( sc.setcolor(q) + c, end='')
  print("")
  time.sleep( .10 )
print("")
print("")


###############################################
#
# Count to 30 on the same line.
#
###############################################

for x in range( 0, 31 ):

    # Move the cursor up one line, and erase that line.
    # This will clear the line that was previusly printed,
    #   and position the cursor to re-print with a new value.
    print ( sc.cursorup() + sc.eraseline(), end='' )

    print( "Counting to 30: " + sc.green( str(x) ) )
    time.sleep( 0.5 ) # Half a second time delay.
print("")
print("")

# End of code.
In concussion.
And that concludes what I have to say about print() in color. I hope that someone out there find’s this useful.
Everyone have a good day, and be kind to each other.
Joe Roten. www.gsw7.net/joe
Last updated: 2020-09-26

As always
The information on my website is FREE.But donations to help pay for Coffee and Beer are always welcomed.
Thanks.